How to Deploy OpenClaw on ClawVPS in 5 Minutes: Full Setup Guide

Meghna Meghwani
May 04, 2026 · 9 min read
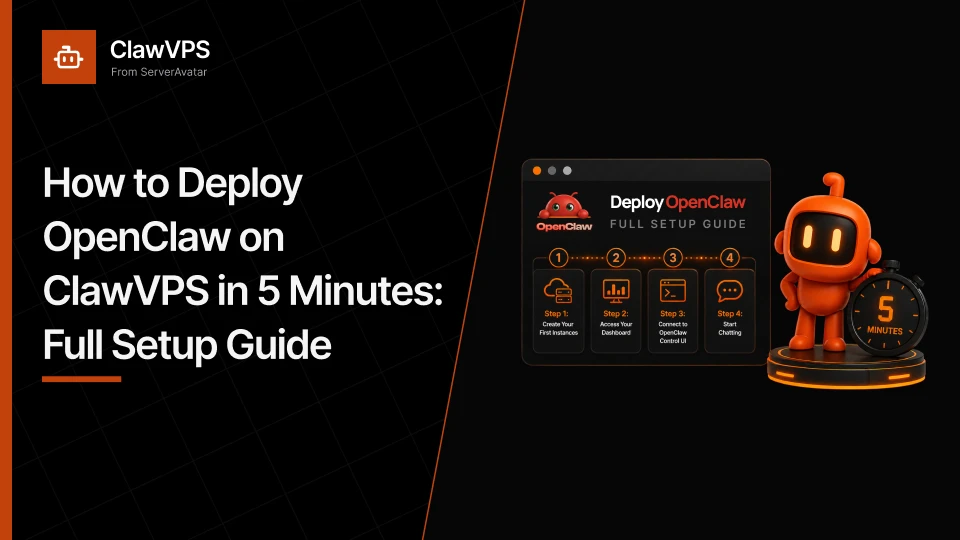
Getting a powerful automation tool up and running shouldn't take hours of setup and troubleshooting. In this guide, you'll learn how to deploy OpenClaw on ClawVPS in just five minutes, even if you're starting from scratch. By the end, you'll have a fully functional setup ready to use, along with a clear understanding of how everything fits together.
I spent 4 hours setting up OpenClaw on a Cloud VPS recently. Manual configuration, SSL certificates, DNS propagation, memory embeddings, Chrome setup, it's a real project before you even get to use the AI.
When I found ClawVPS, I had a production-ready OpenClaw instance running in under 5 minutes. No manual configuration, no terminal commands, no sysadmin knowledge required. This guide is based on hands-on testing, every step below is what I actually did to get an AI agent live on ClawVPS.
What Is ClawVPS?
ClawVPS is managed hosting built specifically for OpenClaw, the open-source AI agent framework. Instead of spending half a day configuring servers, you get a pre-configured instance that's ready the moment it starts.
Who it's for
- Developers who want full control without server admin skills
- Businesses that need a reliable, always-online AI setup
- Startups looking to ship fast without infrastructure headaches
- Beginners exploring AI agents for the first time
What you get out of the box
- Pre-configured Chrome for browser-enabled agents
- Elevated mode in one click
- Persistent vector memory
- Daily automatic backups
- Channels pre-connected (Telegram, Discord, Slack & many more)
- One-click scaling and factory reset
- 24/7 technical support
ClawVPS Pricing
ClawVPS offers four plans designed to fit different workloads, from light experimentation to heavy automation. All plans include the same core features, so you're never locked out of what matters.
Choose between monthly and annual billing. Annual plans save you 25%, you pay for 8.5 months but get a full year.
Monthly Plans
| Plan | RAM | vCPU | Storage | AI Credits | Price |
|---|---|---|---|---|---|
| Alpha | 4 GB | 2 | 80 GB | $5 | $24/month |
| Beta (Most Popular) | 8 GB | 4 | 160 GB | $5 | $34/month |
| Gamma | 16 GB | 8 | 320 GB | $10 | $54/month |
| Delta | 24 GB | 12 | 480 GB | $10 | $74/month |
Annual Plans (Save 25%)
| Plan | RAM | vCPU | Storage | AI Credits | Price |
|---|---|---|---|---|---|
| Alpha | 4 GB | 2 | 80 GB | $5 | $216/year ($18/month) |
| Beta (Most Popular) | 8 GB | 4 | 160 GB | $5 | $306/year ($26/month) |
| Gamma | 16 GB | 8 | 320 GB | $10 | $486/year ($41/month) |
| Delta | 24 GB | 12 | 480 GB | $10 | $666/year ($56/month) |
What's included in every plan:
- Subdomain & SSL
- Real-time monitoring
- Pre-configured agent browser
- One-click Elevated Mode
- Factory reset
- 24/7 human support
- Vector embeddings for persistent memory
- BYOK, bring your own API keys
AI credits: Alpha and Beta plans include $5 in credits. Gamma and Delta include $10 in credits. All credits can be used with ClawVPS's pre-configured OpenRouter key, or switch to your own keys anytime.
ClawVPS vs DIY Hosting: Why I Stopped Doing It Myself
I tried self-hosting OpenClaw on a different VPS. Here's what I learned:
| Feature | ClawVPS | DIY |
|---|---|---|
| Time to first live agent | ~5 minutes | 4–10 hours |
| Monthly maintenance | 0 hours | 1–3 hours |
| Linux knowledge needed | No | Yes |
| Pre-configured Chrome | Yes | DIY |
| Factory reset | One click | Manual rebuild |
| Automatic backups | Daily | DIY |
| Channels (Telegram, Discord, etc.) | Dashboard setup | Manual config |
| SSL & DNS | Auto | DIY |
| Security updates | Auto | DIY |
| Human support | 24/7, real people | None |
| Bonus AI credits | $5–$10 | None |
The sticker price on DIY VPS looks cheaper. But when you factor in your time, setup, plus monthly maintenance, ClawVPS is the cheaper option for anyone who values their hours.
Step-by-Step: Deploy OpenClaw on ClawVPS
This is what I actually did, no assumptions, no skipped steps.
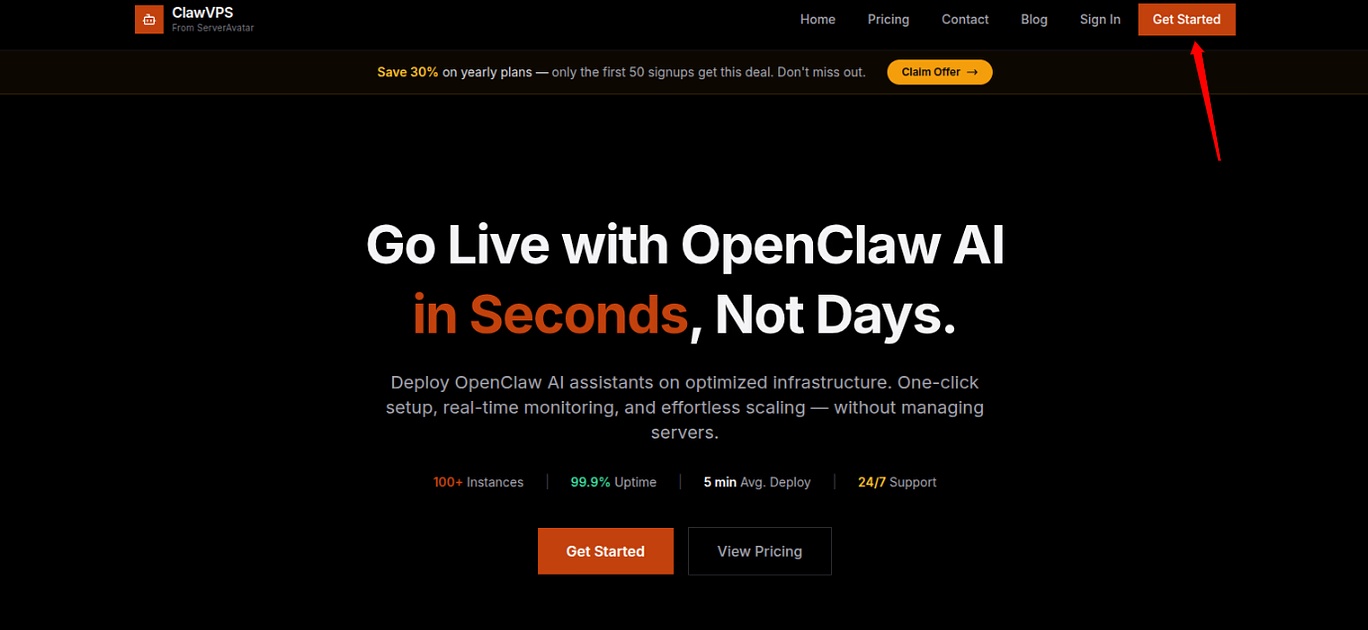
Step 1: Sign Up
- Go to clawvps.ai and click Get Started (top right corner)
- Enter your name, email, and password
- Click Create Account
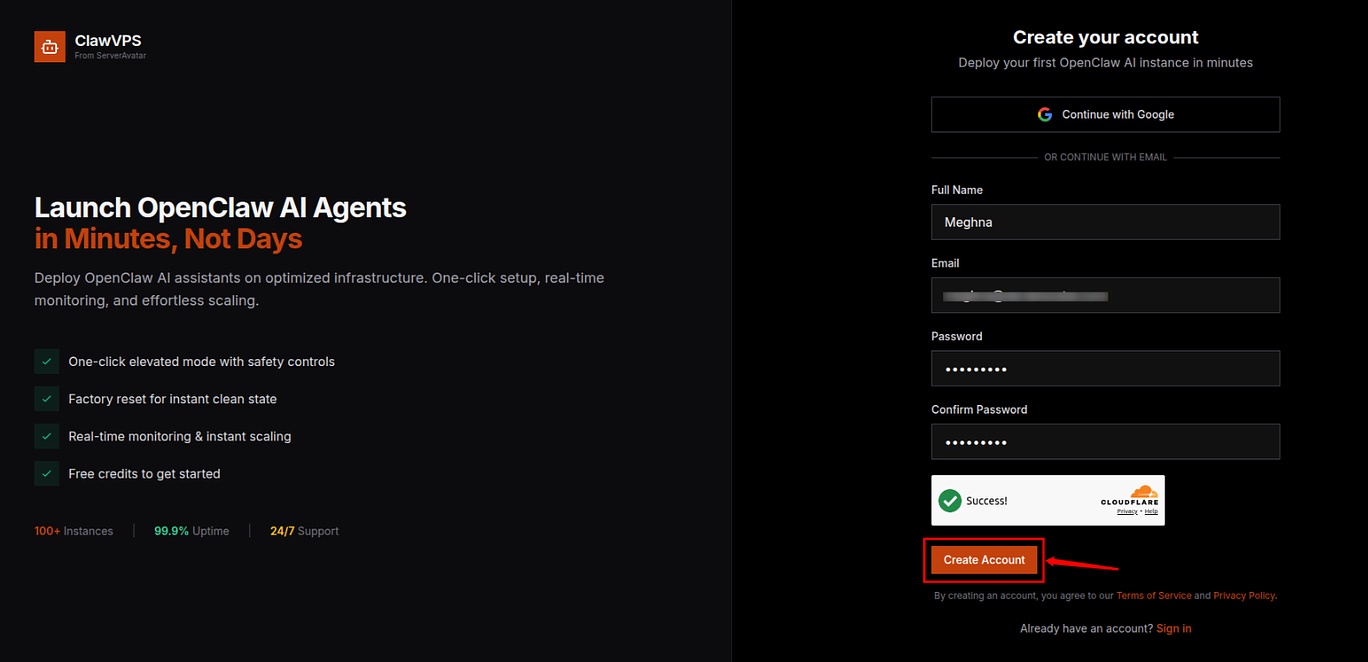
- Verify your email address via verification mail sent to your mailbox
Step 2: Create Your First Instance
- From your dashboard, click Create Your First Instance or New Instance
- ClawVPS provides a 24-hour free trial so you can explore the ClawVPS easily
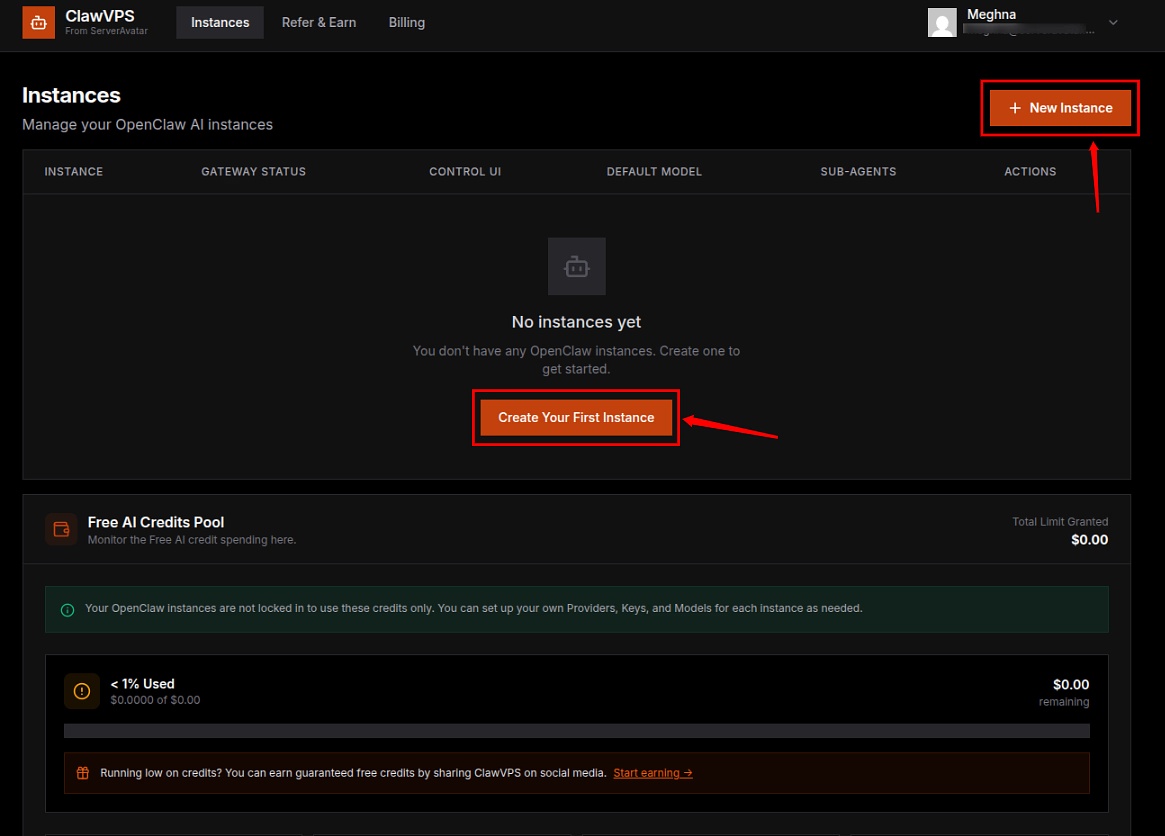
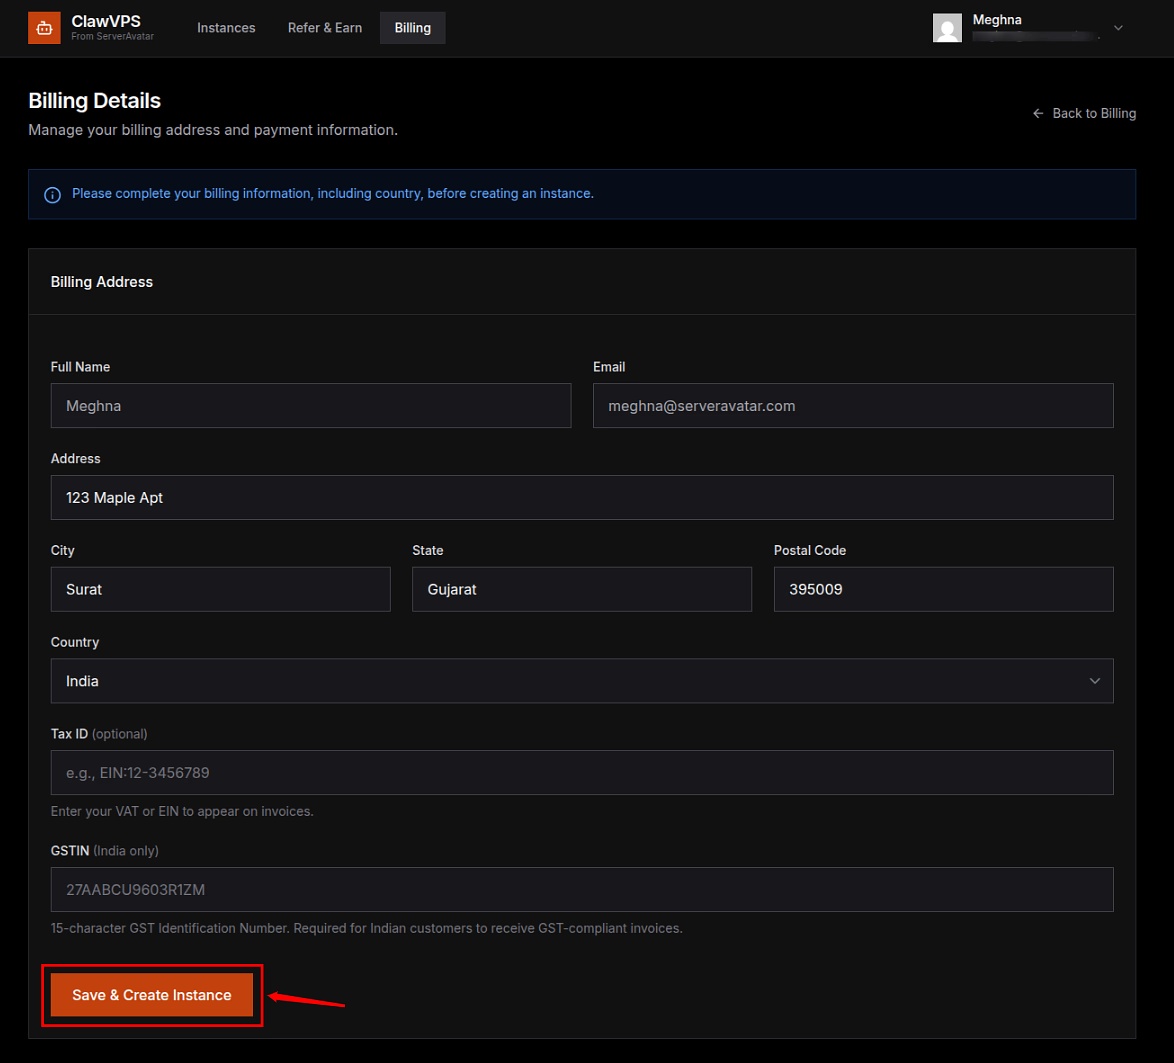
- If you haven't added billing details yet, you'll be prompted to do that first
- Fill in your billing information and click Save & Create Instance
Step 3: Choose Your Plan
- Enter your instance name
- Pick a plan that fits your needs (plans start at $24/month)
- Complete the payment
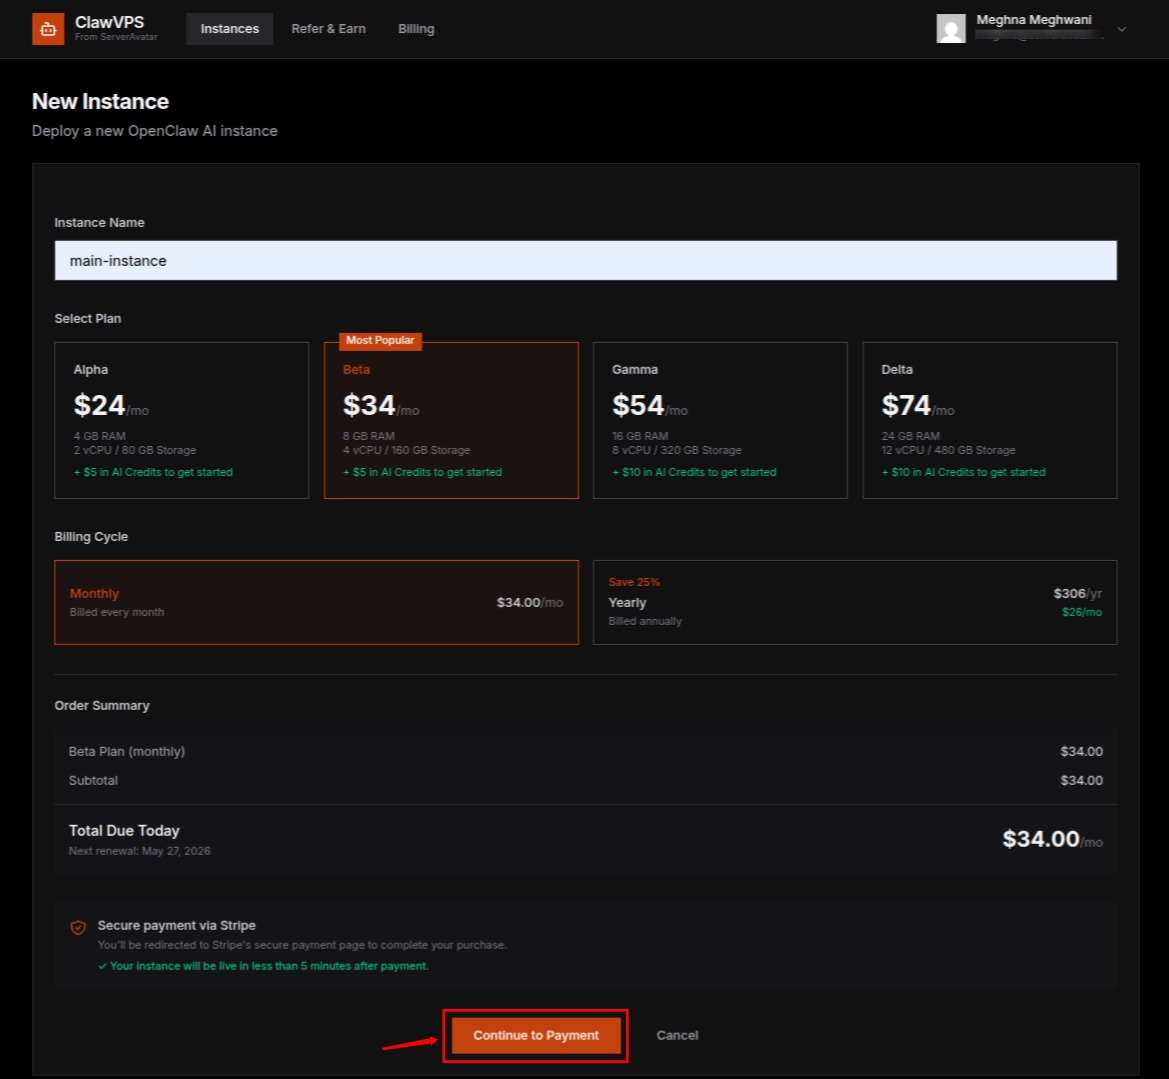
This takes a few minutes, OpenClaw is installed, Subdomain and DNS are configured, and your instance goes live automatically.
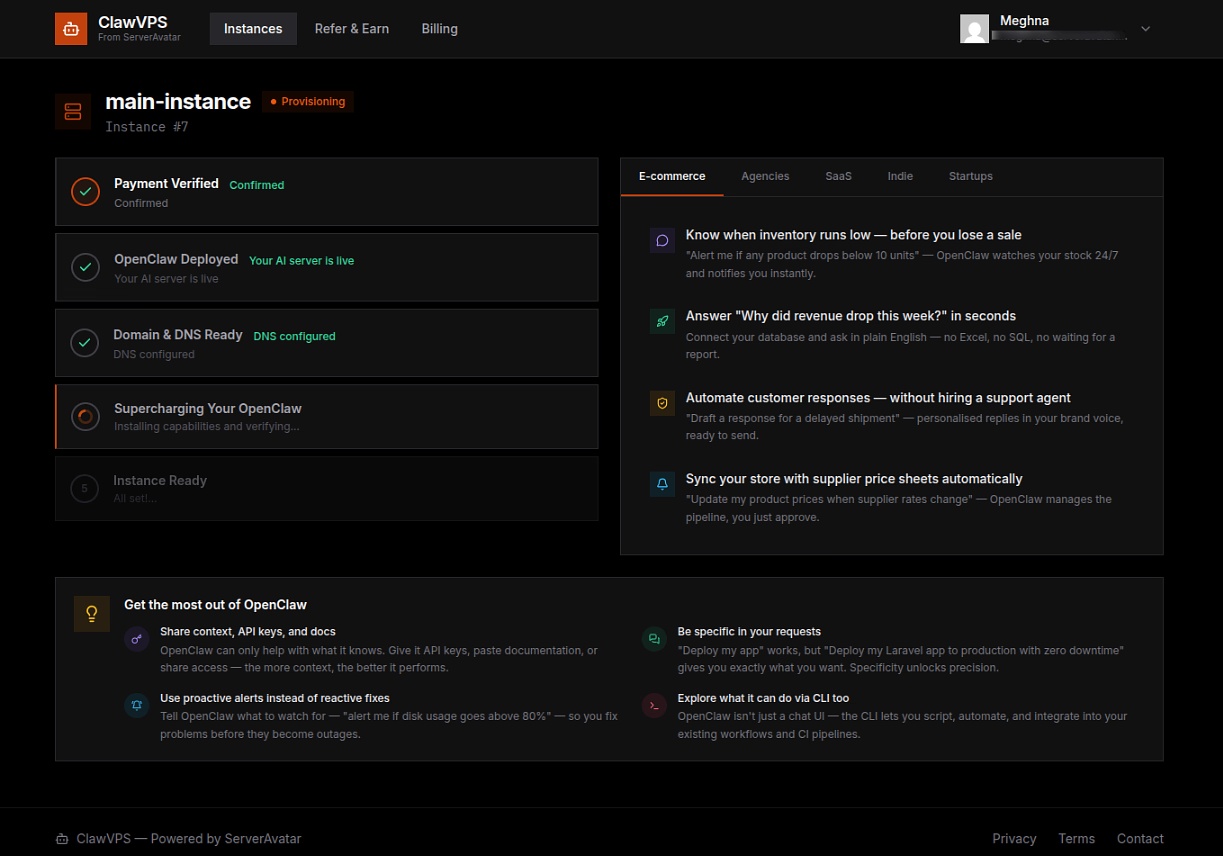
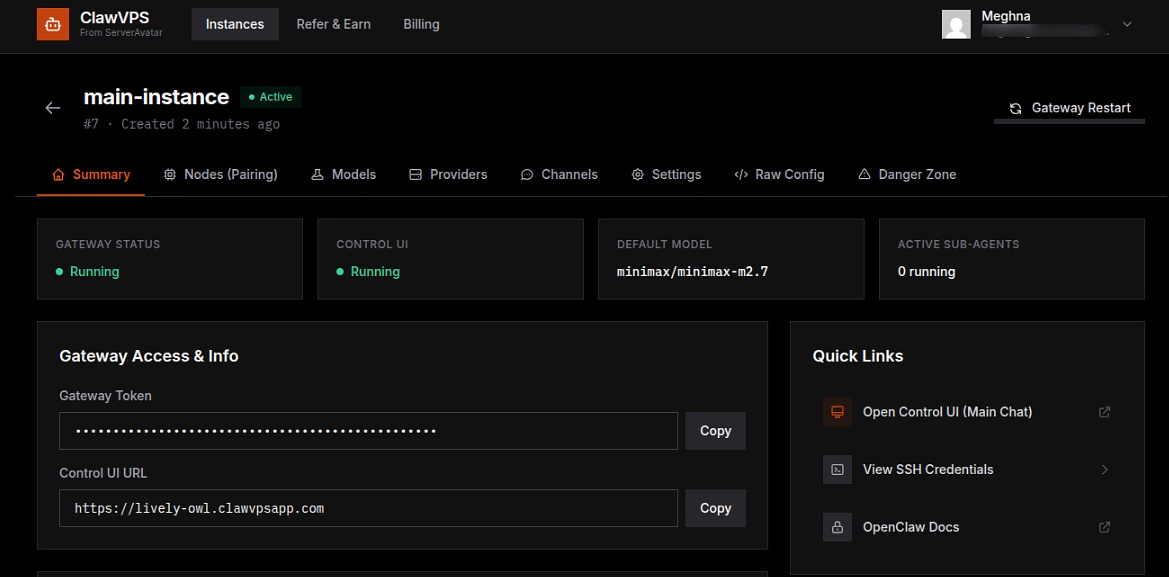
Step 4: Access Your Dashboard
Your dashboard gives you everything you need:
- Gateway details and quick access links
- Instance information and status
- Server health overview
Step 5: Connect to OpenClaw Control UI
- Click Open Control UI (Main Chat Interface) from your dashboard, which opens in a new browser tab
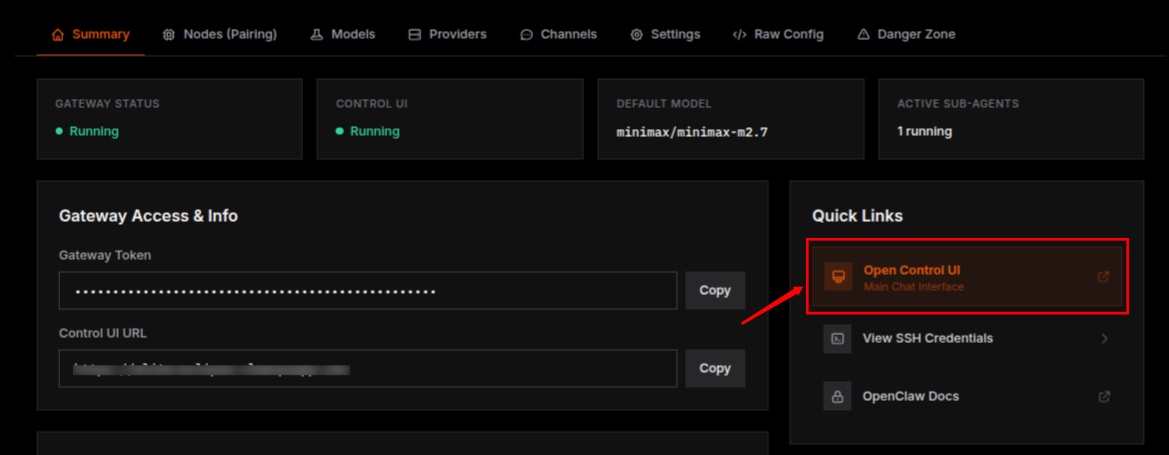
- You can see the interface as mentioned in the snapshot below.
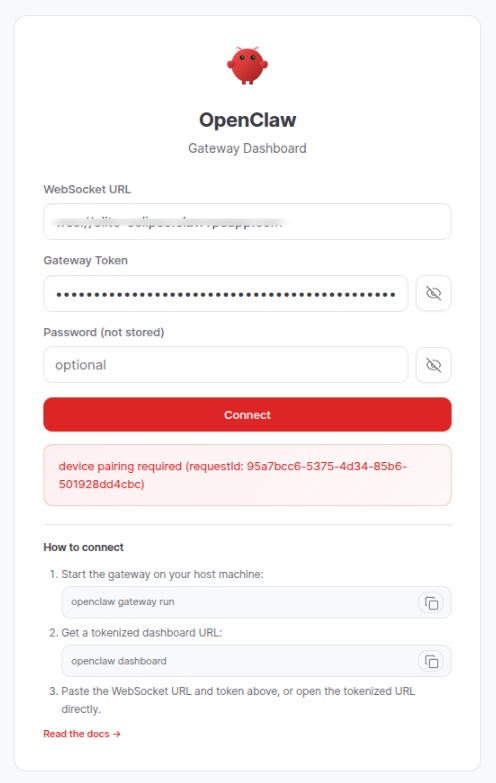
- It automatically takes the Gateway token and automatically sends a pairing request.
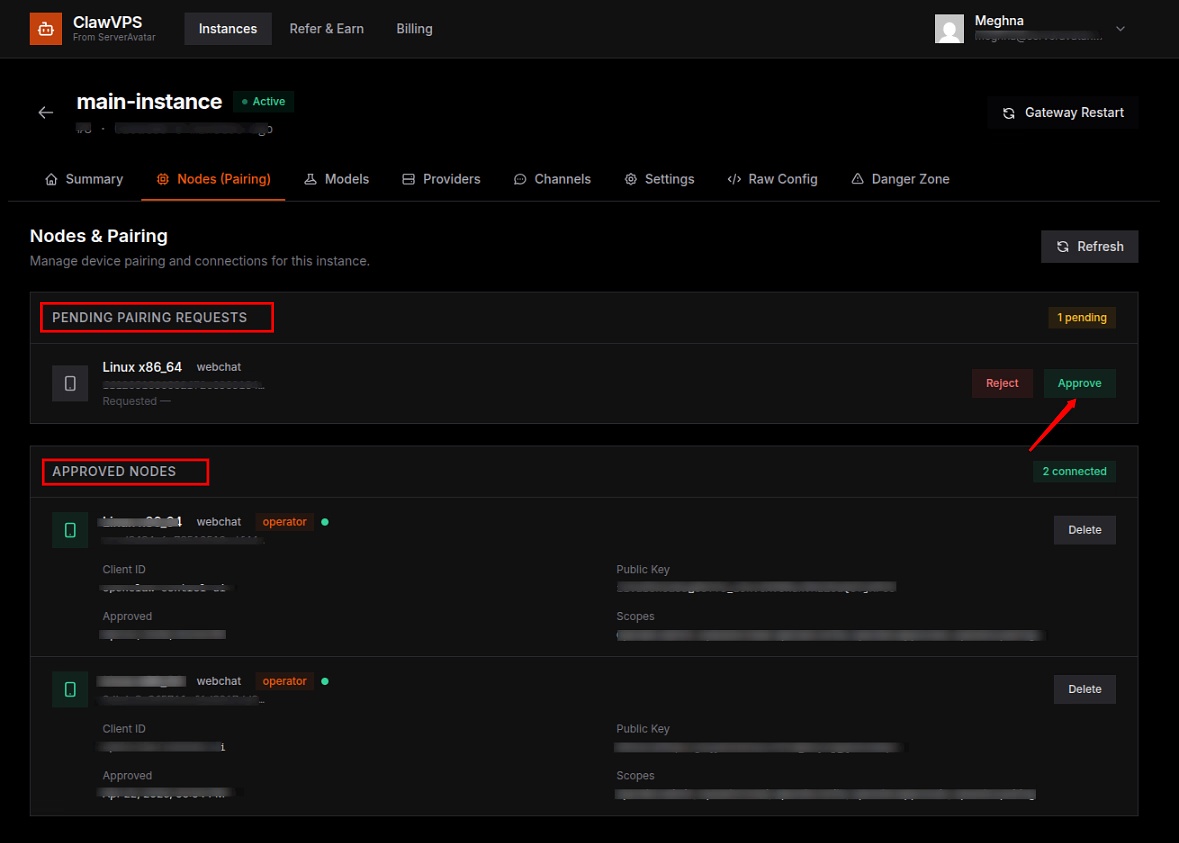
Step 6: Approve Node Pairing
- After clicking Connect, your device sends a pairing request
- Go to Nodes (Pairing) in your dashboard
- Approve the pending request
- Your device is now listed under paired nodes, and secure browser-to-instance communication has been established
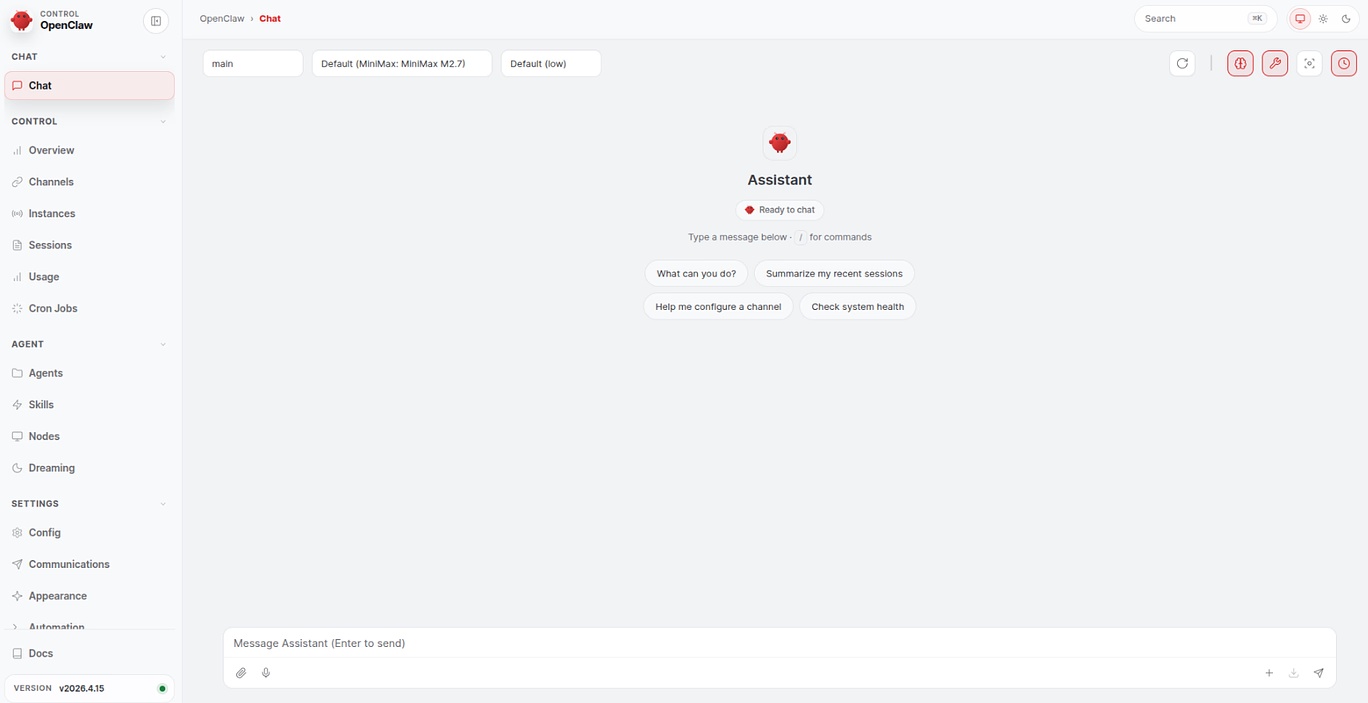
Step 7: Start Chatting
Once paired, the OpenClaw chat interface is fully active. This is your main workspace, conversations, commands, and tasks run in real time.
Step 8: Add Your Own Provider
You can also connect your required AI providers for more flexibility.
- Go to the Providers section
- Add your API keys (such as OpenAI, Anthropic, Google, OpenRouter, etc.)
- Choose from a wide range of supported providers (40+ options available)
- Select and add your provider

No markups. You pay each provider directly at their published rates.
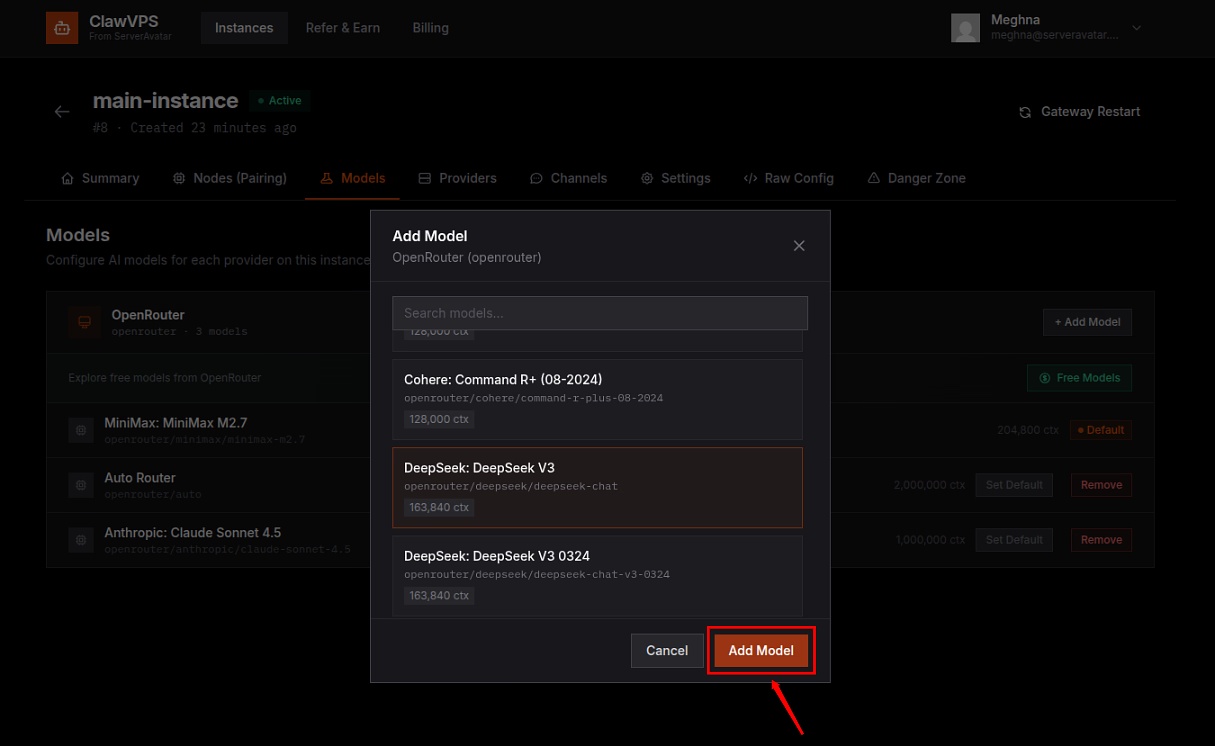
Step 9: Configure Your AI Model
- Go to the Models section in your dashboard
- Add or select your preferred model (GPT-4, Claude, Gemini, Llama, and 1000+ more)
- Set a default model for your assistant
- You can select and use the free AI models.
ClawVPS provides free AI credits ($5–$20 based on your plan) so you can test before bringing your own keys. You can also use free AI credits provided by ClawVPS.
Step 10: Connect Messaging Channels
Extend your AI assistant to the platforms you already use:
- Go to Channels
- Click Connect on Discord, Telegram, or Slack
- Follow the on-screen steps to link your account
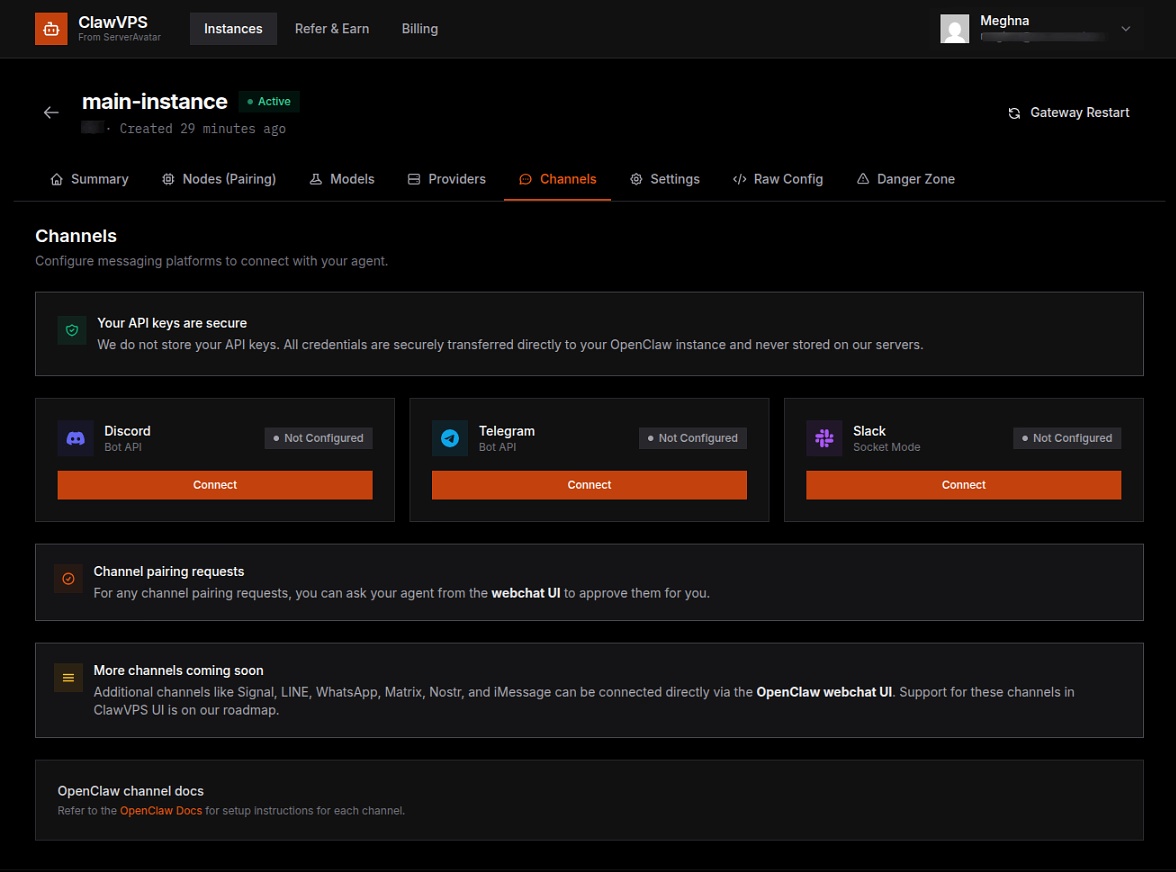
Once connected, your AI assistant responds directly on those platforms, no browser needed.
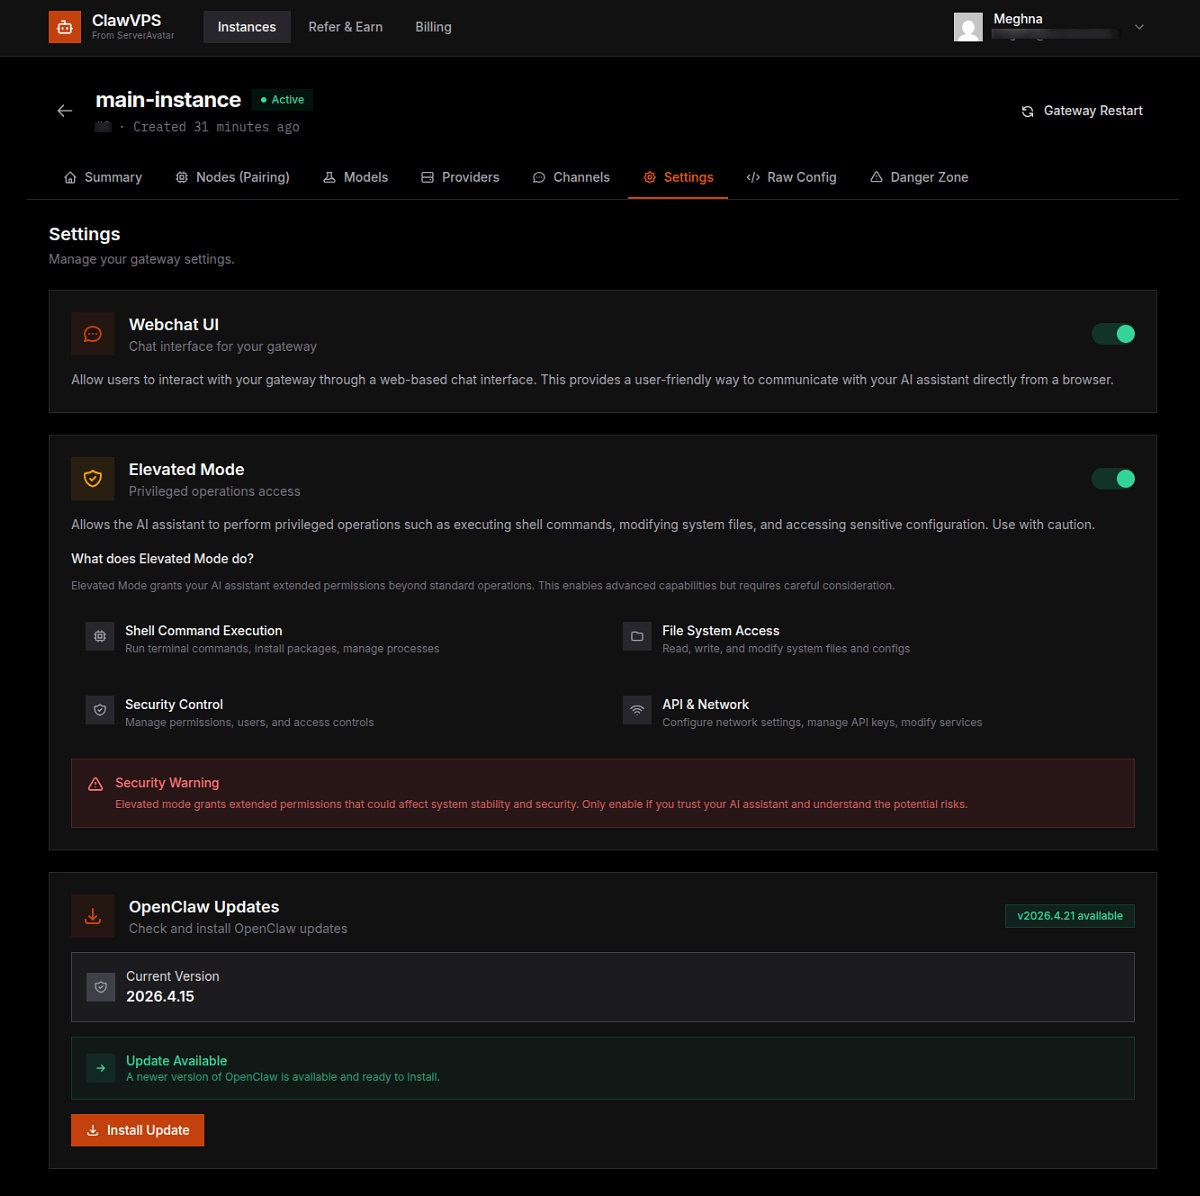
Step 11: Explore Settings and Advanced Features
Webchat UI: Enable or disable the web chat interface from Settings.
Elevated Mode: Turn this on for root-level access. Your agent can:
- Execute server commands
- Manage files and directories
- Control system-level operations
Elevated Mode gives your agent full root access. Only enable it when you understand what you're doing, and when you genuinely need that capability.
Updates: Monitor and install OpenClaw updates from here. Instances stay current automatically.
Step 12: Use Raw Configuration (Advanced)
The Raw Config section lets you edit your full instance configuration in JSON. This is for advanced users who want to:
- Fine-tune AI behavior
- Customize memory, tools, and integrations
- Modify system-level settings
Always back up your config before making manual changes.

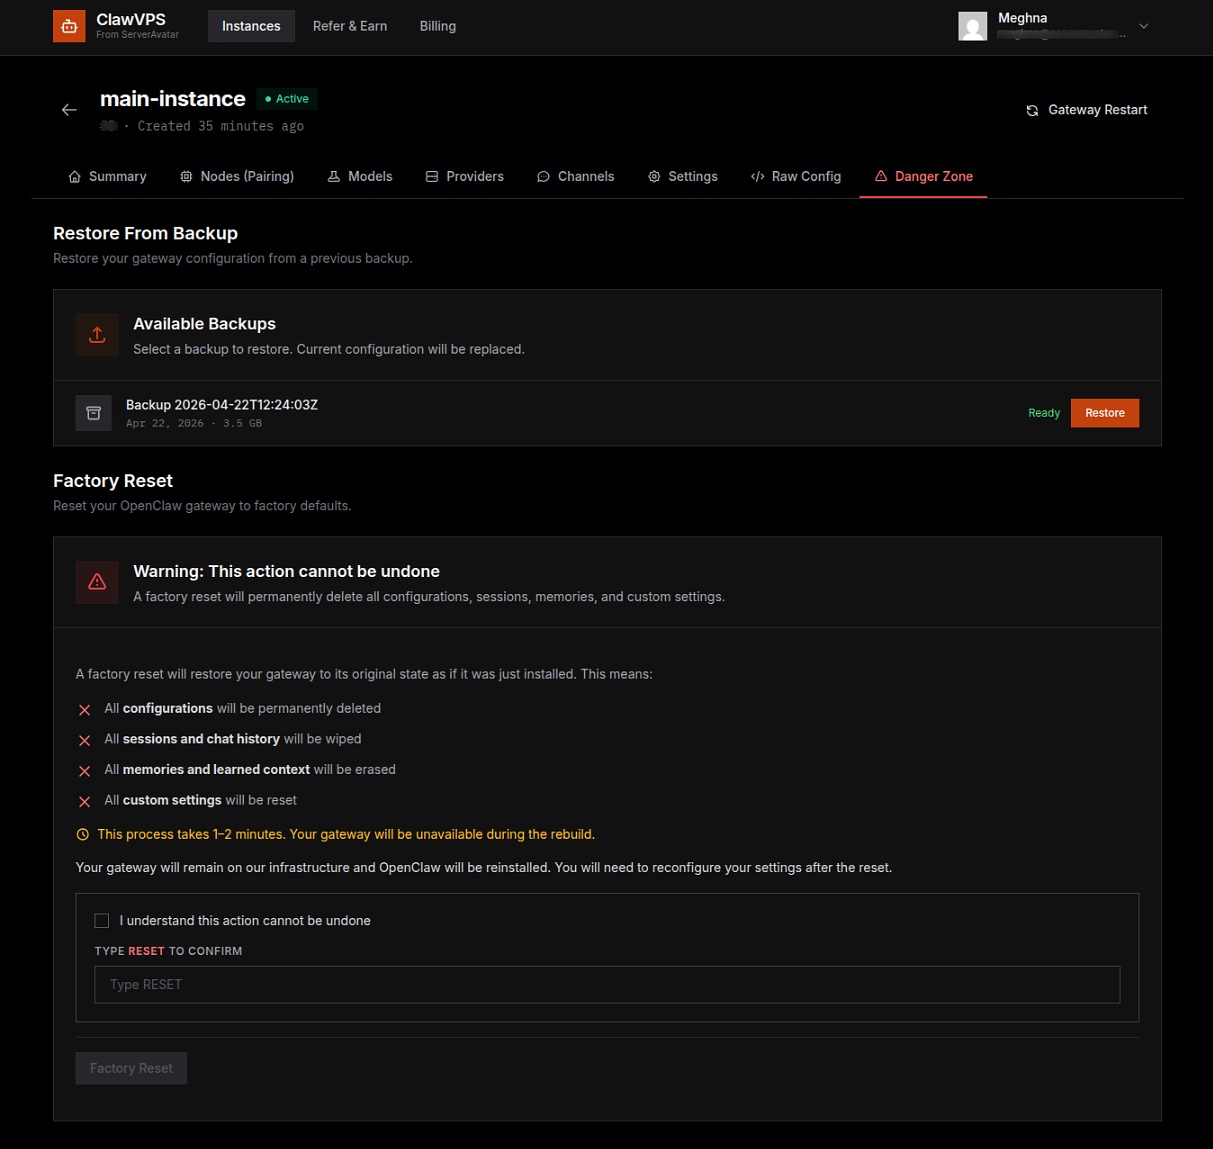
Step 13: Backups and Factory Reset
Inside the Danger Zone, you'll find:
- Available Backups: saved snapshots you can restore from
- Restore from Backup: revert to a previous configuration
- Factory Reset: wipe everything and start fresh
Factory reset permanently deletes all configurations, chat history, sessions, memory, and custom settings. Your instance returns to its original state and OpenClaw is reinstalled.
Features I Actually Used
These are the features that made me stick with ClawVPS instead of going back to DIY:
-
Factory Reset: I broke my agent's memory twice during testing. One click, and it's a clean instance. No server rebuild, no reconfiguration.
-
Elevated Mode: When I needed my agent to run shell commands and install tools, I didn't need to touch the server myself. The agent did it with the right permissions.
-
Pre-configured Chrome: I didn't have to set up a headless browser. It just worked from day one.
-
One-click Scaling: When my agent needed more power, I upgraded the plan, and the instance scaled without any downtime or re-deployment.
-
Daily Backups: I restored from a backup twice when a configuration change went wrong. It took under 2 minutes.
Conclusion
Setting up OpenClaw the traditional way takes half a day of work before you even start using your AI agent. ClawVPS removes that barrier completely, from signup to a live, production-ready instance in minutes, not hours. Whether you're a developer who wants full control, a startup trying to ship fast, or a beginner just getting started with AI agents, ClawVPS gives you everything you need without the sysadmin overhead. Your keys, your models, your agent, managed for you so you can focus on what it actually does rather than how to keep it running.
FAQs
1. How long does deployment actually take?
Most instances are live within 5 minutes. If there's a queue or unusual load, it may take some more time, but that's rare.
2. Do I need a credit card for the free trial?
No, every new account gets a 24-hour free trial with full feature access. No payment required upfront.
3. Can I use my own API keys?
Yes, Bring your own from any of the 40+ supported providers, including OpenAI, Anthropic, Google, and OpenRouter. No markups on tokens, you pay each provider directly.
4. What happens if my agent crashes or breaks?
Use the one-click Factory Reset to restore a clean instance in seconds. Or restore from a previous backup if you want to keep your configuration intact.
5. Can I cancel anytime?
Yes, Cancel from your dashboard at any time, and you can also back up your data before deletion.